If your company uses Sharp printers with the Sharp MFP web-interface, you can connect them to allow for users to print items using their JumpCloud credentials via LDAP.
These steps were validated with Sharp MX-2651 printers, but should also apply to similar models.
To configure your Sharp MFP:
- Log in to the Sharp MFP’s web interface home page.
- Go to System Settings > Network Settings > LDAP Settings.
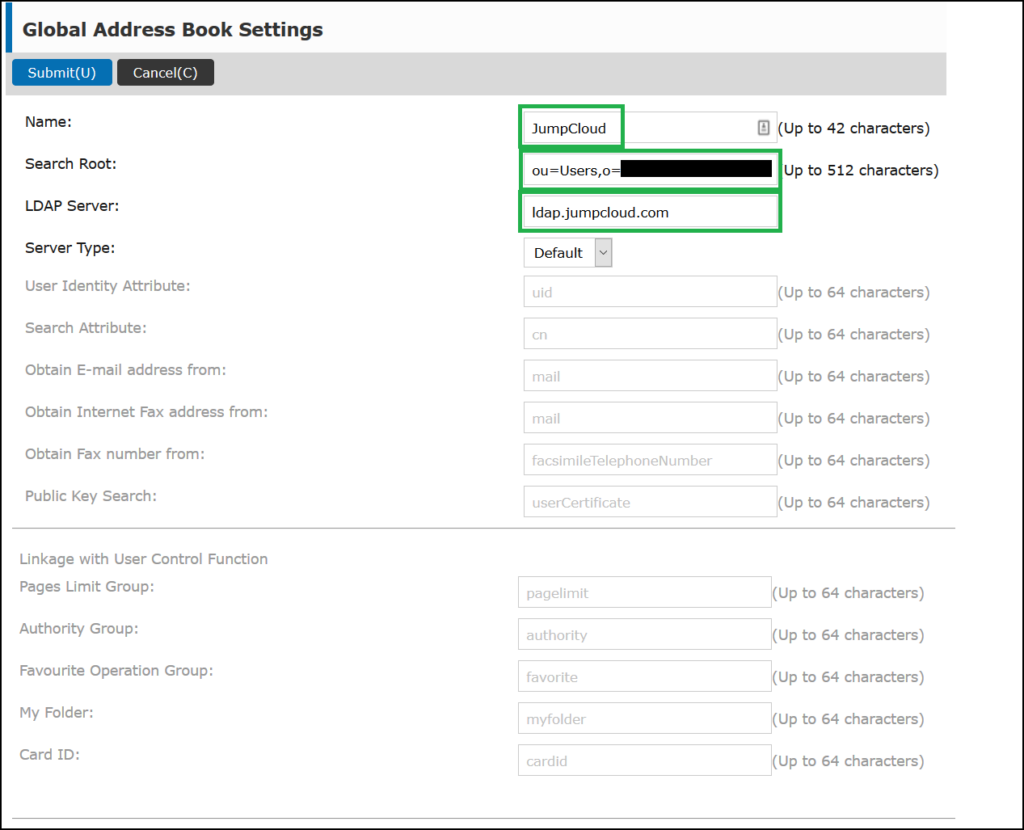
- Add a new Global Address Books List:
- Name: JumpCloud
- Search Root: ou=Users,o=YOUR_ORGANIZATION_ID,dc=jumpcloud,dc=com
- LDAP Server: ldap.jumpcloud.com
- User Name: YOUR_LDAP_SERVICE_ACCOUNT_USERNAME
- Password: YOUR_LDAP_SERVICE_ACCOUNT_PASSWORD
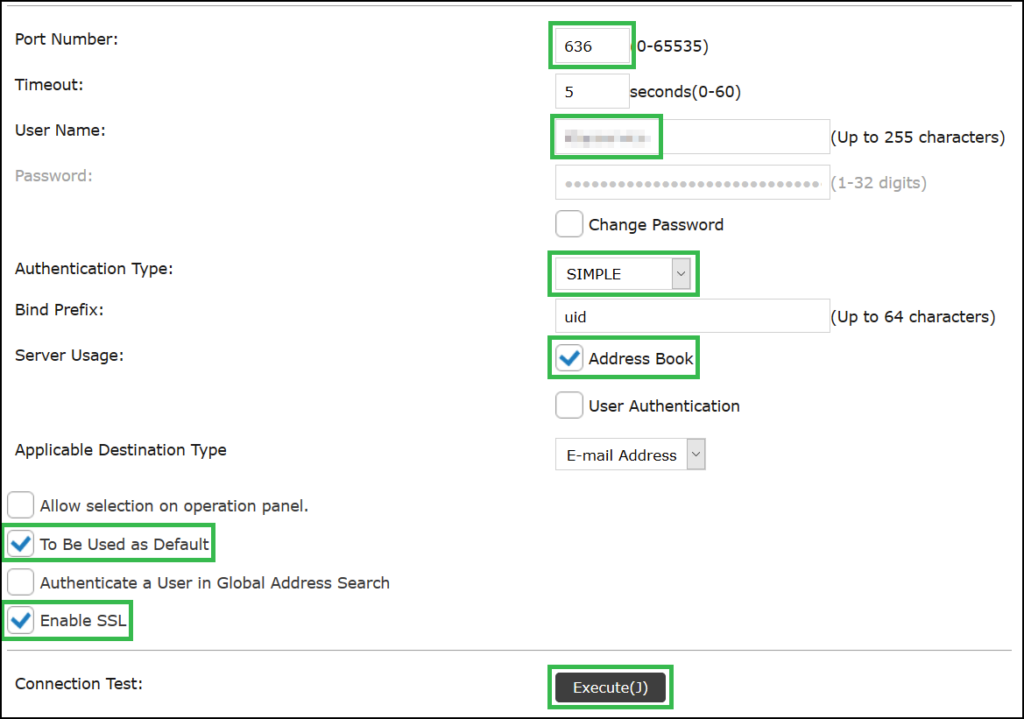
- Port Number: 636
- User Name: YOUR_LDAP_SERVICE_ACCOUNT_USERNAME
- Password: YOUR_LDAP_SERVICE_ACCOUNT_PASSWORD
- Authentication Type: SIMPLE
- Bind Prefix: uid
- Server Usage: Address Book and User Authentication
- Select To Be Used as Default.
- Select Enable SSL.
- Under Connection Test, click Execute, and then Submit to save.
Sharp recommends rebooting the MFP once the new settings are submitted.


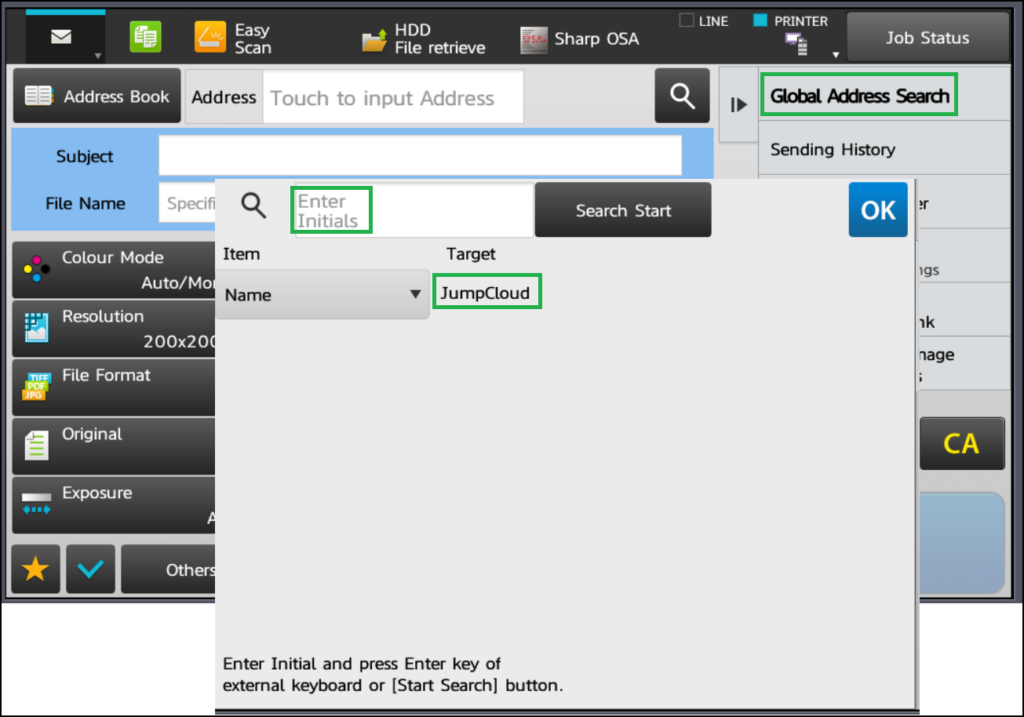
You can then configure the permissions on the printer(s) within the Sharp MFP web-interface. Consult Sharp's documentation and resources for their best practices and configuration steps for permissions. JumpCloud users can then be be found in Global Address Search within the MFP web-interface.
