There are different types of accounts and services that are a part of the authentication and authorization process on a Mac. Each of these accounts and services originate from the way that macOS works with local user account management. Leverage these best practices for account management on macOS with JumpCloud. Learn how to create an account for macOS, take over existing accounts, and more.
Terminology, Definitions, and Services
| Term | Definition & Service |
|---|---|
| Login Password (or User Password) |
|
| Bootstrap Token |
|
| Keychain |
|
| FileVault (FV) |
|
Creating a Mac Account for the First Time
To set up your macOS account for the first time:
- Verify that the Sleep, Restart and Shutdown buttons are visible on the Login screen.
- The User Account you created during the macOS initial setup is presented to you for login.
- At this point, FileVault is not enabled, so there won't be a login screen for FileVault at this time.
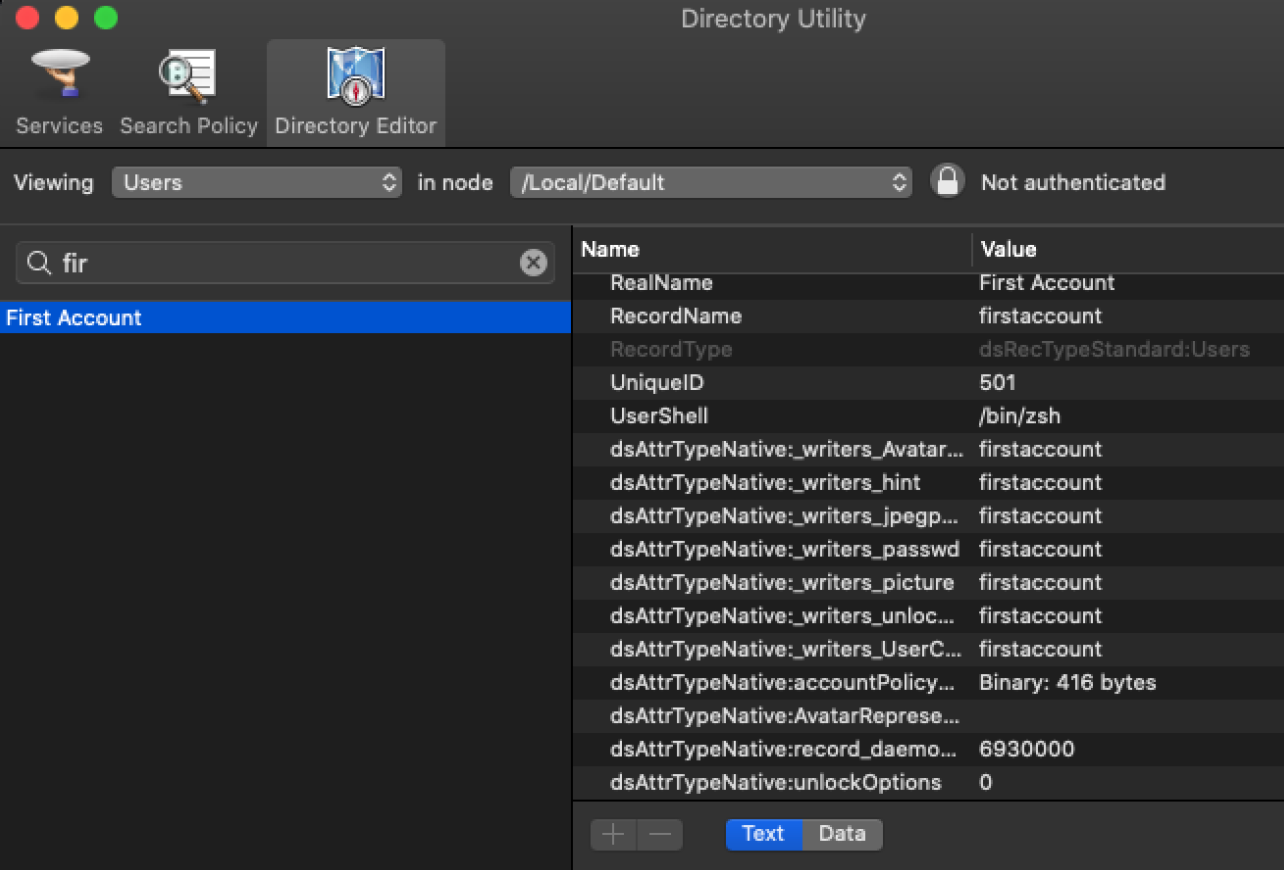
When the first macOS user is created on a new device, the initial account is given the UniqueID of 501. This can be verified by looking at the Directory Utility by going to macOS > Directory Editor > Viewing: Users.
In the latest versions of macOS Big Sur and above, you can verify that the initial user setup on a Mac device is provided with a Secure Token:
Installing the JumpCloud Agent
To install the JumpCloud agent:
- Install the JumpCloud Agent for macOS.
- You can do this through any available method:
- When the macOS JumpCloud Agent has been installed, you can verify the agent's service account within Directory Utility. During the macOS JumpCloud Agent installation, the service account user _jumpcloudserviceaccount, will also be granted a Secure Token.
Creating New Accounts on Mac
After you create a new account, you can provision accounts from JumpCloud. New accounts can be made for users that already exist and are active within JumpCloud.To create a new user account on macOS for an active JumpCloud user:
- Bind the user to a device by going to the user's Details panel and clicking Devices.
- Allow up to a few minutes for the synchronization to take place.
- Advise your user to log in using their JumpCloud credentials.
- The user is prompted to go through macOS's one-time Setup Assistant menu before accessing their macOS desktop since this a brand new user from the macOS's device's perspective.
- The user will then be presented their macOS desktop and can begin working and using their new Mac device.
Note: User's UniqueID numbers will increase incrementally by one when provisioning new users to macOS. For example, the firstaccount user is given 501. If we were going to provision a new user, i.e. secondaccount, from JumpCloud to this Mac device, the new user, secondaccount, would be assigned the UID 502.
Taking Over an Existing Account
To take over an existing account with JumpCloud, see Take Over an Existing User Account with JumpCloud.
Note: Ensure that only UNIX or POSIX characters are used within usernames in both macOS and JumpCloud. Verify that the macOS username matches the JumpCloud Local User Account attribute.
Enabling FileVault and MacOS
If it's the first time you're enabling FileVault on a Mac, the user enabling FileVault will be required to log out for it to take effect. Whether you manually enforce FileVault through System Settings in macOS, or use JumpCloud's Create a Mac FileVault 2 Policy, both have the same first-time workflow for enabling FileVault.
When a device is undergoing first-time FileVault enablement, the user is prompted to enter the password for "firstaccount" to be added to FileVault.
Log back in to confirm FileVault is enabled:
When restarting the Mac to show the FileVault login screen, use these guidelines:
- The FileVault login screen is to unlock the disk, which means the macOS hasn't been loaded yet.
- You won't be able to connect to wifi or networking in this state because macOS isn't loaded.
- All users with Secure Token will be listed.


