Apple has made a change in macOS 13 Ventura that affects JumpCloud and IT Admins. In macOS 13 Ventura, end users have the ability to switch off persistent software, such as the JumpCloud agent. JumpCloud has implemented new processes to address this concern, which vary depending on the configuration of your organization.
You must apply this policy after you upgrade or install macOS 13 Ventura. Applying the policy before the device has Ventura installed causes the policy to not be recognized.
Prepare Your Organization
Depending on how your organization manages its macOS devices, the actions you must take to ensure smooth operation vary:
- If you are using JumpCloud’s MDM with your macOS Devices - JumpCloud will automatically prepare the JumpCloud Agent for this macOS 13 feature.
- If you are using JumpCloud in addition to another MDM - JumpCloud provides a Managed Login Items policy that, once configured, prevents users from disabling persistent software. See below.
- If you are using JumpCloud with no MDM - It is incumbent on you as the systems admin to counsel your users to not disable the JumpCloud items in the Login Items section of macOS 13 Ventura’s System Settings. JumpCloud recommends that you use an MDM to manage your macOS devices as it allows you to securely and remotely configure your organization’s devices and update software and device settings. For more information, see Get Started: MDM.
Understand the Managed Login Items Policy
To prevent your macOS users from turning off persistent software such as the JumpCloud Agent, you must configure the Managed Login Items Policy. This policy allows Admins to allowlist login items for macOS devices based on RuleTypes defined by Apple:
- Bundle Identifier - Unique identifier for a given application, often written in reverse domain notation, such as
com.jumpcloud.darwin-agent. If a Bundle Identifier Prefix rule type is selected, a rule value of com.jumpcloud would allow any package with a Bundle Identifier that starts withcom.jumpcloud, such ascom.jumpcloud.assist-apporcom.jumpcloud.pwm.desktop.live. - Launchd plist label - Unique identifier for a given launchd automated process. If a Launchd Label Prefix rule type is selected, a rule value of com.jumpcloud will allow any launched item with a label prefix of
com.jumpcloudto operate, includingcom.jumpcloud.jcagent-trayorcom.jumpcloud.user-agent. - Apple Codesigning Team Identifier
Login items managed by this policy installed on macOS 13 systems or later will always be activated and the end user of the device cannot deactivate these items, even if they are administrators of their device. All items are evaluated against all RuleTypes and when matched it will be locked in the UI and automatically approved.
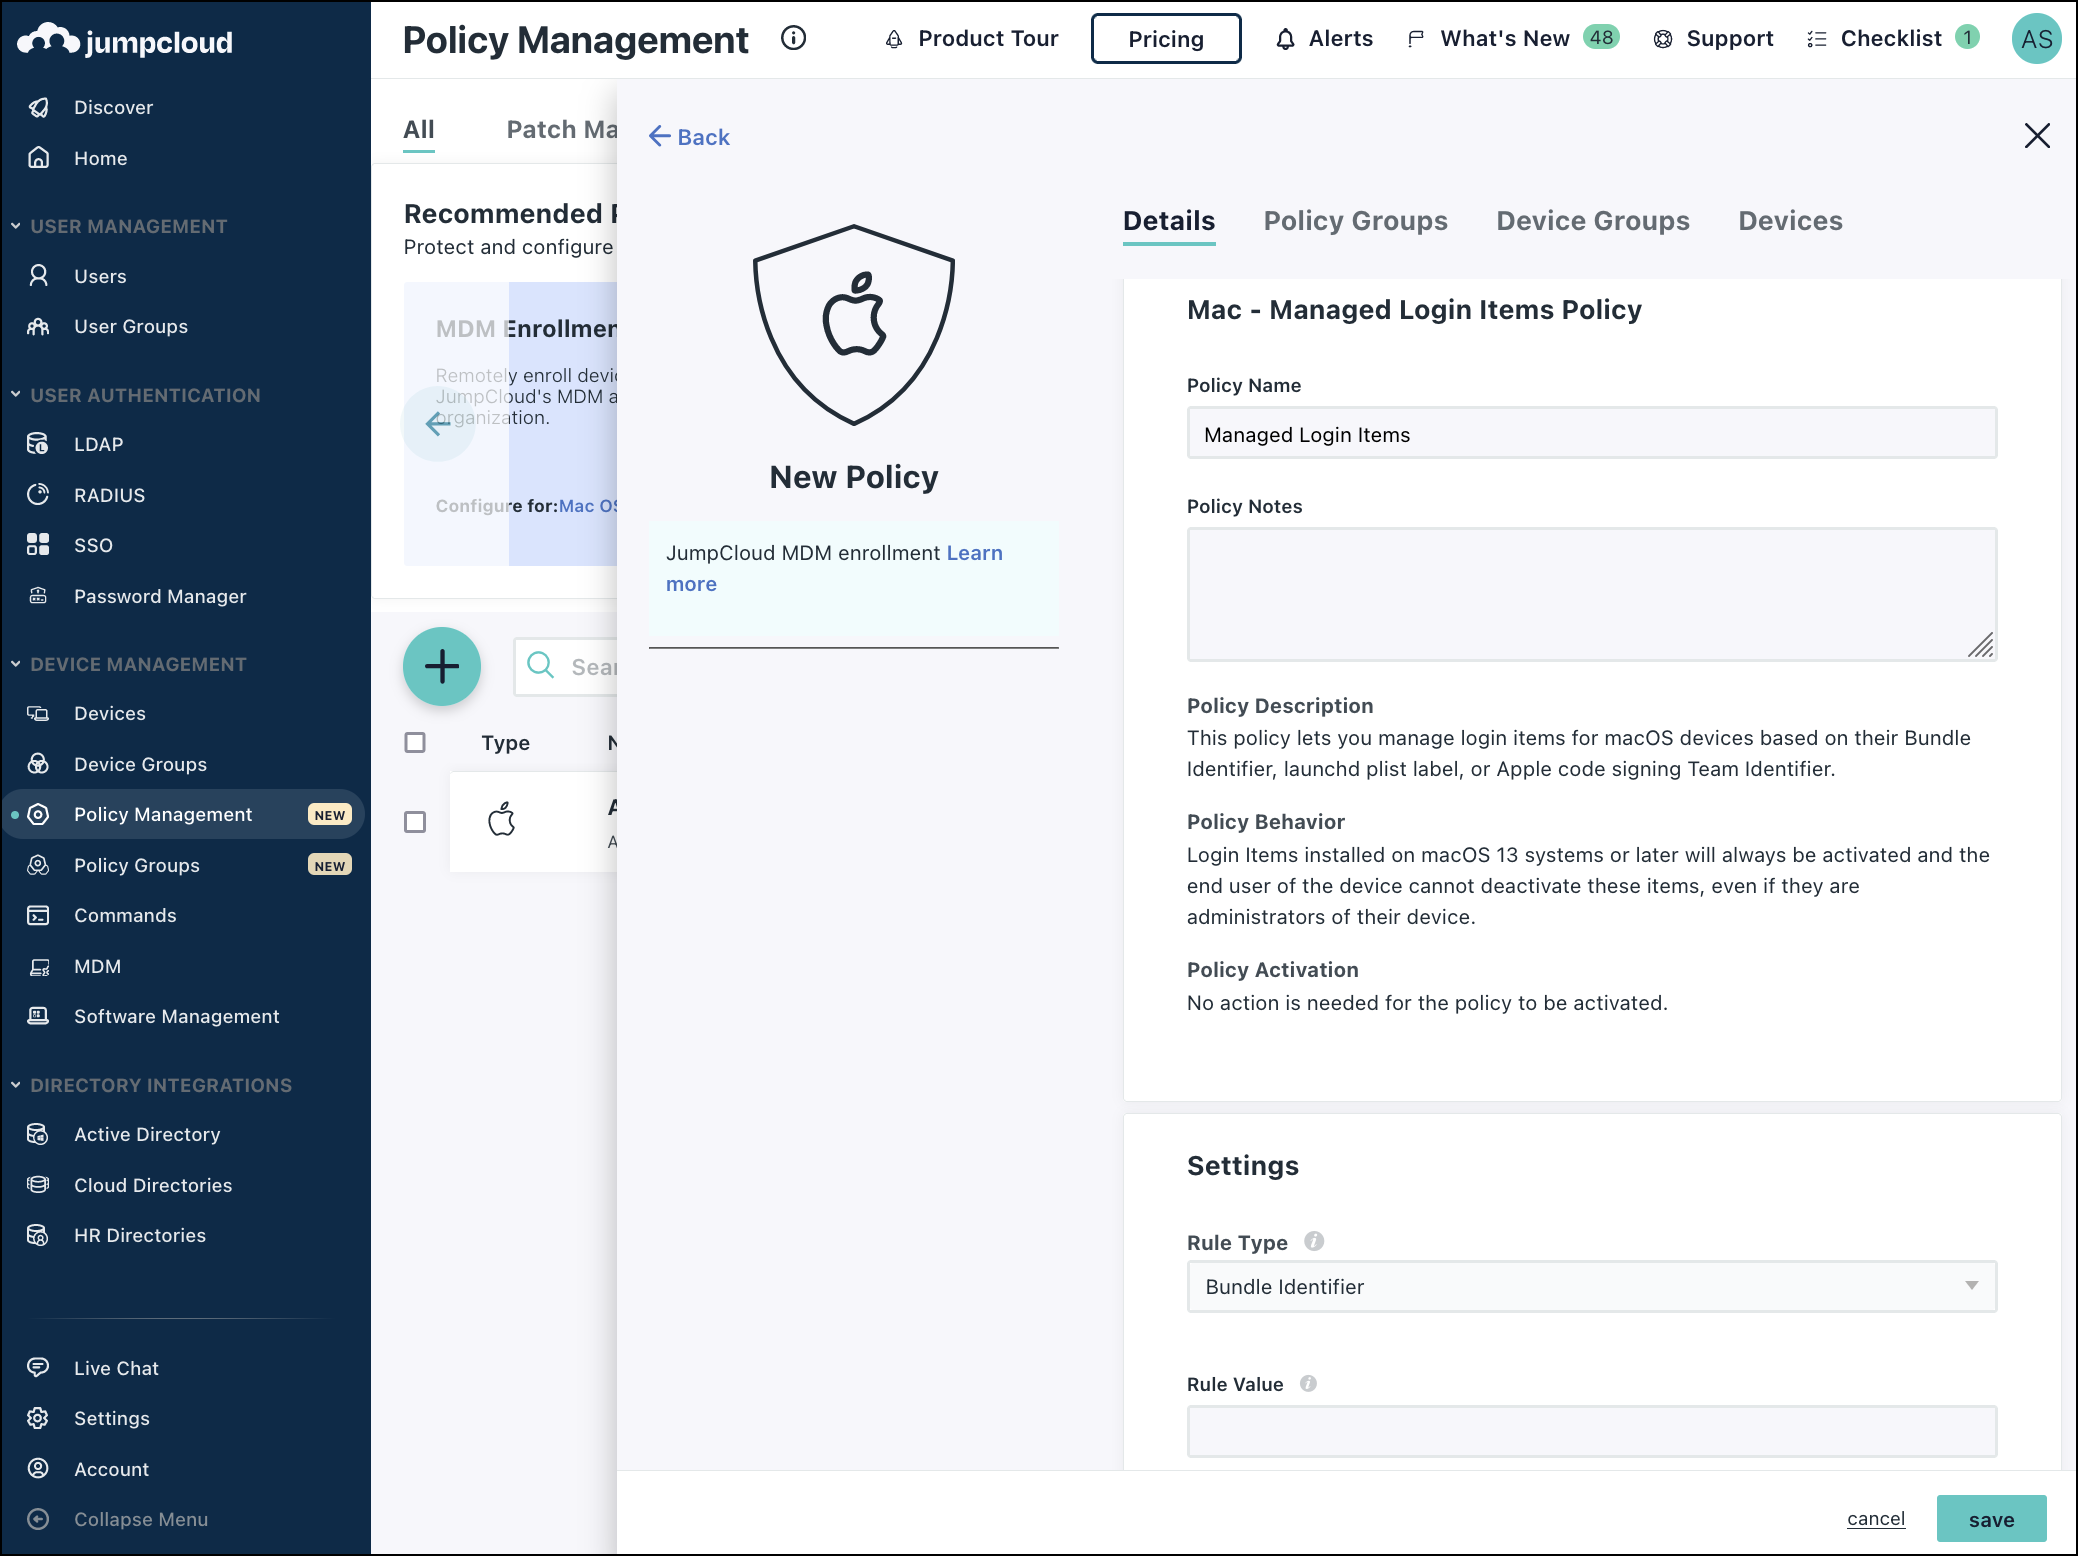
Create a Managed Login Items Policy
- Log into your JumpCloud Admin Portal: https://console.jumpcloud.com/
- Navigate to DEVICE MANAGEMENT > Policy Management.
- Click the green + icon.
- In the window that appears, select Mac.
- Find Managed Login Items Policy from the select of policies and click Configure.
- (Optional) In the Policy Name field, enter a new name for the policy or keep the default. Policy names must be unique.
- (Optional) In the Policy Notes field, enter details like when you created the policy, where you tested it, and where you deployed it.
- Select a rule type:
- Bundle Identifier - The bundle identifier of the app to match, which must be an exact match.
- Bundle Identifier Prefix - The prefix of the bundle identifier of the app to match.
- Label - The value of the launchd plist Label parameter to match, which must be an exact match.
- Label Prefix - The prefix of the launchd plist Label parameter to match.
- Team Identifier - The team identifier from the code signing attributes, which must be an exact match.
- Enter a rule value. For example, the rule value for BundleIdentifier is the unique identifier for the application, generally in reverse domain notation, such as com.jumpcloud.darwin-agent.
- (Optional) Select the Policy Groups tab and select one or more policy groups that will include this policy.
- (Optional) Select the Device Groups tab and select one or more device groups where you'll apply this policy. For device groups with multiple OS member types, the policy is applied only to the supported OS.
- (Optional) Select the Devices tab and select one or more devices where you'll apply this policy.
- Click save.
